
Photoshop Hints and Tricks: Creating Smooth Lineart and Base Colors
For digital artists with clean, crisp styles, having uneven lineart can ruin an otherwise excellent drawing. Missing pixels in your base colors also messes up details and makes for more work in the long run. These instructions will assist digital artists of all skill levels in making clean lineart and flawless base colors with Adobe Photoshop.
Required Knowledge
To follow these instructions, you should have a basic understanding of Photoshop tools.
If you need help understanding Photoshop’s interface and tools, visit http://psd.tutsplus.com/sessions/
Required Materials
To complete these instructions, you will need the following:
- Any version of Adobe Photoshop (even Elements)
- A mouse
- Optional: A graphics tablet and stylus
- A scanner
- A scanned drawing
Steps
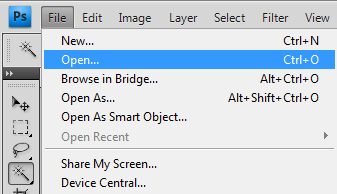 Step 1) Open your scanned drawing into Photoshop. You can title the layer of the drawing whatever you wish. For the sake of this tutorial, the drawing layer will be titled, “Sketch.”
.
.
Important: Most scanners double or triple the size of scanned images. If that is the case with yours, skip this step.
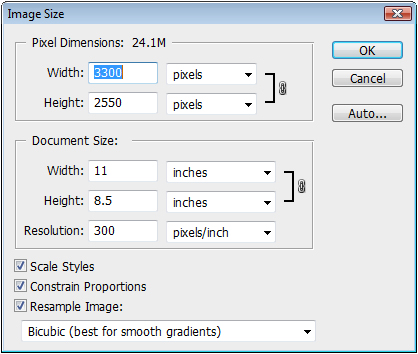 Step 2) Double the size of the document.
A) Go to the Image menu
B) Select Image Size
C) Make sure the “Constrain Proportions” box is checked
D) Double the Width of the image
By doubling the image size before doing the lineart, you get greater levels of detail. Your lines will also look neater when you halve the image size after the drawing is complete.
.
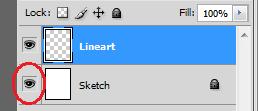
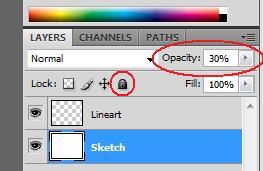 Step 3) Set the opacity of “Sketch” to about 30%.
You’ll need to click the padlock icon to unlock the “Sketch” layer in order to change its opacity.
.
.
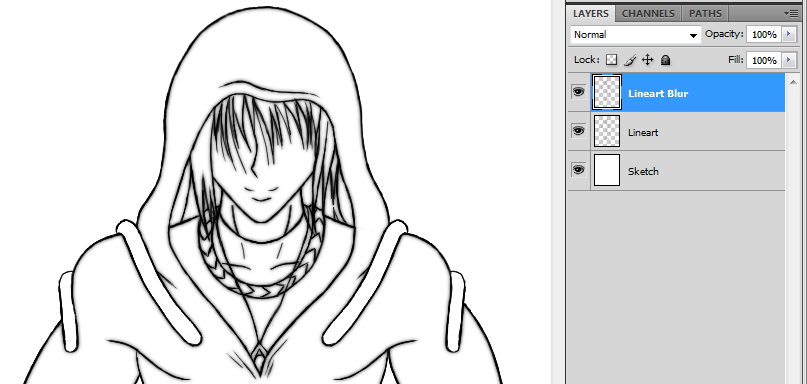
 Step 4) Create a new layer above the “Sketch” layer. Title this layer “Lineart.”
.
.
.
.
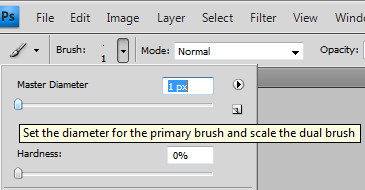 Step 5) Set the Brush tool’s diameter to 1 pixel.
.
.
.
.
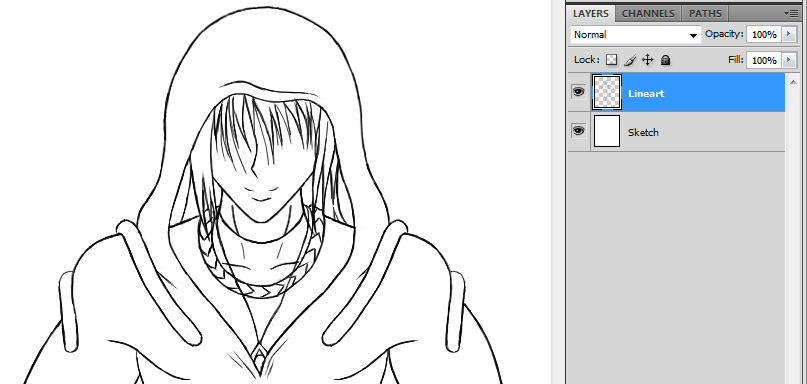
 Step 6) Begin drawing the lines on the “Lineart” layer over the original drawing.
To check the evenness of your lines, hide the “Sketch” layer by clicking the eyeball icon.
.
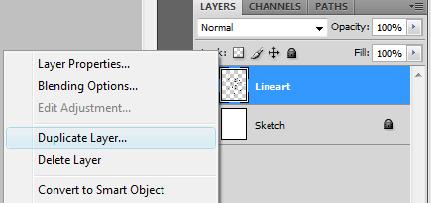 Step 7) When the lineart is done, duplicate the “Lineart” layer.
Title this layer “Lineart Blur.”
.
.
.
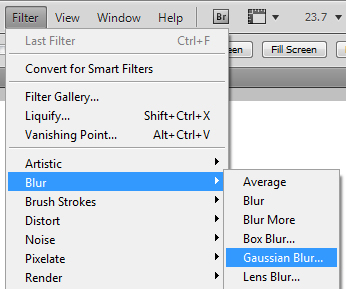 Step 8) While on “Lineart Blur,” go to the Filter menu
A) Select Blur
B) Select Gaussian Blur
C) Set the radius to roughly 1.7 pixels
D) Click “Ok”
.
.
 With Gaussian Blur, your lineart will change from something like this…
.
.
.
 …to something like this. Minor mistakes will be hidden by the blur, especially when you size-down the image later.
.
.
Step 9) Create a layer between “Sketch” and “Lineart.” Title this layer “Green.”
.
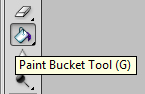 Step 10) Use the Paint Bucket tool to fill “Green” with a bright green color.
Note: This bright green color will make it easier to spot mistakes when putting down base colors. But it doesn’t have to be green. Feel free to use any bright, highly saturated color.
.
Step 11) Create your base color layers. Give them titles you can quickly find later on, such as “Skin (Base)” or “Hair (Base).” Put these layers beneath “Lineart.”
.
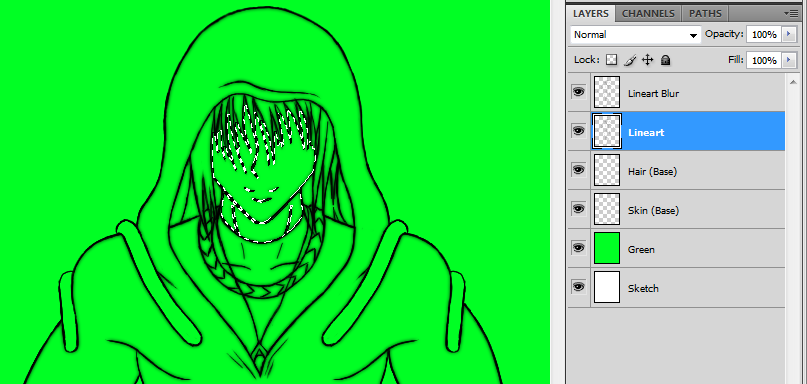 Step 12) While on the “Lineart” layer, use the Magic Wand tool to select segments you want to color.
.
.
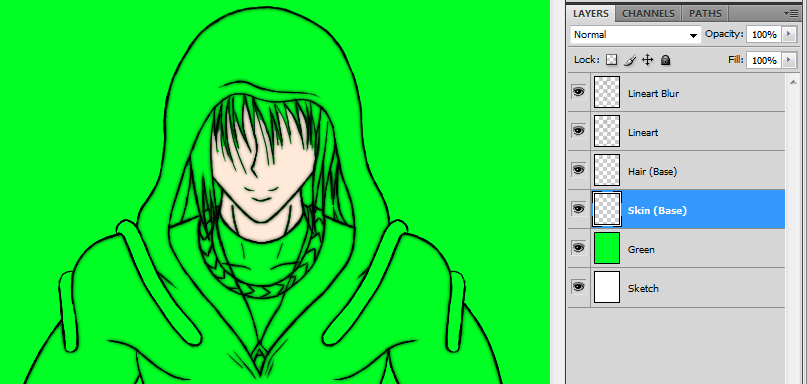 Step 13) Return to the appropriate layer – in this case, “Skin (Base)” – and use the Paint Bucket to fill in the highlighted area.
Note: Use ctrl+d to deselect once you’re done.
.
Step 14) Use the Brush tool and the green background to fill in any missed pixels. Repeat Steps 12 – 14 until the entire drawing is colored.
.
Important: Do not complete this step until the entire drawing is finished.
Step 15) Follow the instructions of Step 2 to halve the size of the image.
.
Congratulations. With all of these hints and tricks under your belt, your lineart and base colors will look smoother than ever before. From here, you can add shadows, highlights, effects, or put down your mouse and call it a day.

